So, you’ve been staring at that beautiful piece of timber, imagining the perfect design that could turn it into something amazing. But getting that Cricut design to actually stick properly to wood? Well, that’s where things can get a bit tricky, especially if you’re new to working with these materials.
So, let me show you exactly how to do this right (and save you from the frustration of peeling vinyl).
This post may contain affiliate links to products that we receive a commission for (at no additional cost to you). Learn more here.
First Things First: Choosing Your Method
There are two main ways to transfer Cricut designs onto wood, and picking the right one makes all the difference between a professional-looking finish and a frustrating experience:
1. Heat Transfer Vinyl (HTV) Method
- Best for uneven or rustic wood surfaces where traditional vinyl might not transfer properly.
- Creates a more durable bond that can withstand regular handling and cleaning
- Feels more integrated with the wood because the heat helps the vinyl integrate into the grain.
2. Permanent Adhesive Vinyl Method
- Perfect for smooth, sealed wood surfaces that have been properly prepared.
- Easier to apply for beginners since it doesn’t require special equipment.
- Great for intricate designs because it maintains fine detail better than HTV.
The Secret to Success: Proper Wood Preparation
Here’s something most people don’t realize – most vinyl transfer failures happen because of poor surface preparation, not because of the vinyl or design itself.
Let’s fix that with a foolproof preparation process.
A. Start with Sanding The Wood Surface
- Use 150-180 grit sandpaper first to remove any major roughness or inconsistencies.
- Work your way up to finer grits (220-320) for a smoother finish.
- Keep going until the surface feels completely smooth to the touch with no rough patches.
B. Clean That Surface Like You Mean It
- Remove ALL dust with a tack cloth, making sure to get into every corner and crevice.
- Remember, there are no shortcuts at this step – every speck matters because even tiny particles can prevent proper adhesion.
- Give it a final wipe with a clean, dry cloth to ensure no residue remains.
C. Now Seal the Deal
- Apply a coat of wood sealant (such as Tung oil or Linseed oil) to create a proper surface for the vinyl to grip.
- Let the wood sealant dry completely (24 hours minimum) to ensure the surface is fully cured.
- IMPORTANT! This step is non-negotiable for unfinished wood, as raw wood will never hold vinyl properly.

Method 1: Heat Transfer Vinyl (HTV) Application
This is my personal favorite method because it creates such a professional finish. Here’s what you’ll need to get started:
Essential Supplies:
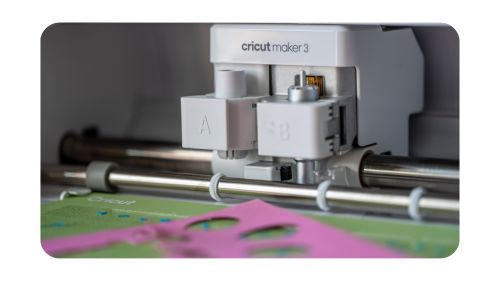
- Cricut machine (any model will work for this technique)
- Heat Transfer Vinyl in your chosen color and finish
- Weeding tool for removing excess vinyl
- Uncoated butcher paper to protect your design
- EasyPress or EasyPress Mini for consistent heat application
- Your prepared wood surface that’s been properly sealed
Step-by-Step Process:
1. Design Preparation
- Open Cricut Design Space and set up your workspace.
- Create or upload your design, making sure to size it appropriately for your wood surface.
- Remember to MIRROR your design (this is crucial because HTV is applied face-down).
- Cut your HTV using your Cricut, making sure to use the correct settings for your vinyl type.
2. The Transfer Process
- Preheat your wood surface (15 seconds) to ensure it’s ready to accept the vinyl.
- Position your weeded design carefully, making sure it’s exactly where you want it.
- Cover with butcher paper to protect both the vinyl and your wood surface.
- Press at 300°F for 40 seconds, applying firm and even pressure throughout.
- Let it cool completely before peeling to ensure the strongest possible bond.
Pro Tip: Always do a test run on a scrap piece of wood first. It’s better to waste a small piece of vinyl than to ruin your entire project with incorrect settings or technique.
Method 2: Permanent Adhesive Vinyl Application
This method works beautifully on smooth, sealed wooden surfaces where you want a clean, precise finish. Here’s how to nail it every time:
What You’ll Need:
- Permanent adhesive vinyl in your chosen color and finish
- Transfer tape that’s appropriate for your vinyl type
- A scraper tool for smooth application
- Your prepared wood surface that’s been properly sealed and cleaned
The Application Process:
A. Prepare Your Design
- Cut your design (no mirroring needed this time) with proper blade settings.
- Weed away excess vinyl carefully to preserve fine details.
- Apply transfer tape carefully, working from the center outward to prevent bubbles.
B. The Transfer
- Position your design exactly where you want it on the wood surface.
- Start from the center to prevent alignment issues.
- Work outward with your scraper using firm, consistent pressure.
- Remove transfer tape at a 45-degree angle, watching carefully for any lifting.
3 Most Common Issues (And How to Fix Them)
Now, to be perfectly honest – things don’t always go right the first time, even for experienced crafters. So, let’s go through a few of the tricky problems that may crop up (and how to fix them before they ruin your project):
Issue 1. Vinyl Not Sticking?
- Double-check your surface preparation and check that you didn’t miss any spots.
- Make sure you completed the full drying time for that wood sealant (rushing this step is tempting but costly).
- Apply more pressure during transfer, using firm, overlapping strokes.
Issue 2. Bubbles Appearing?
- Work from the center outward in smooth, consistent motions.
- Use slow, firmer pressure rather than quick, light strokes.
- Consider using a pin to release trapped air, but be very gentle to avoid tearing.
Related Post: Why Does My Tung Oil Finish Have Bubbles In It! [Explained]
Issue 3. Edges Lifting?
- Consider sealing the edges with Mod Podge after application.
- Try using the HTV method instead of adhesive vinyl if the problem persists.
- Check if your wood is properly sealed all the way to the edges.
Making It Last: Sealing Your Design
Now, do you want your design to last longer? Well, then here’s a pro tip that will make all the difference:
After application, consider adding a protective layer to ensure longevity:
- Use Mod Podge (matte or glossy) for basic protection against handling.
- Apply Polycrylic for extra durability against moisture and wear.
- Let it cure completely before handling or displaying your piece.
Some Final Thoughts
Creating beautiful wood signs with your Cricut isn’t rocket science – but it does require attention to detail and the right technique for your specific project.
Basically, take your time with the preparation steps, choose the right method for your particular design and wood type. And if you do, you’ll be creating professional-looking pieces that will last for years to come.

