The idea of routing wood with a Dremel might seem a little… unconventional. After all, those big ol’ router tools at the hardware store look like they mean business. But hear me out, because this little rotary tool packs a punch when it comes to precision cutting and shaping.
I recently tackled a pretty sweet DIY project – a handmade wooden sign for my living room. And let me tell you, I would have been dead in the water without my Dremel. See, I wanted to route out a small design on the edge of the sign, but I didn’t have access to a full-size router. Enter the Dremel – with the right attachments, I was able to carve out those intricate details like a total boss.
Now, I know what you might be thinking – can a Dremel really stand up to the power of a router? Well, the short answer is yes… and no. Honestly, it depends on the project. You see, for smaller, more delicate work, the Dremel is a superstar. But for larger-scale routing, you might need to bring in the big guns.
But before you write off the Dremel as a viable routing option, let me break down exactly how to use it, what materials work best, and the key things to keep in mind. Trust me, once you see how versatile this little tool can be, you’re going to want to start dreaming up all kinds of custom woodworking crafts.

This post may contain affiliate links to products that we receive a commission for (at no additional cost to you). Learn more here.
Gearing Up for Routing with Your Dremel
Okay, so you’ve got your trusty Dremel – now what? Well, the first step is making sure you’ve got the right attachments and bits to get the job done.
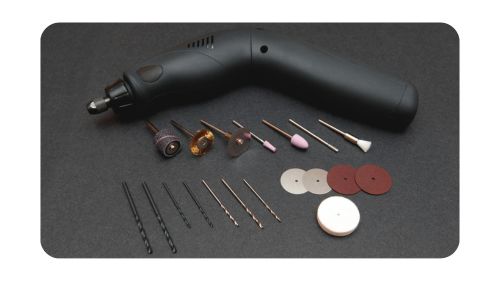
For starters, you’ll want to invest in some router bits designed specifically for use with a Dremel. These come in a variety of styles, like cove bits, roundover bits, and straight bits. And let me tell you, having the right bit can make all the difference in the world when it comes to clean, precise cuts.
But that’s not all – you’ll also want to pick up a plunge router attachment for your Dremel. This bad boy transforms your rotary tool into a mini router, giving you way more control and depth adjustment options. Trust me, it’s a game-changer.

Choosing the Right Wood for Dremel Routing
Now, when it comes to the actual wood you’ll be routing, there are a few things to keep in mind. Generally speaking, softer woods like pine, chipboard, and plywood are going to be your easiest bet. They’re more forgiving and won’t put too much strain on your Dremel.
But if you’re feeling a little more adventurous, you can definitely try your hand at routing medium-hardness woods like oak, walnut, and birch. Just be prepared to take things a little slower and be extra careful – those harder materials can really put your Dremel through its paces.
And whatever you do, steer clear of super-hard hardwoods. I’m talking stuff like maple or Brazilian cherry. Those woods are just too dense for a Dremel to handle efficiently. You’re way more likely to end up with a burnt, splintery mess.
Mastering the Routing Technique
Okay, so you’ve got your Dremel (models such as the Dremel 3000, 4000, and 4300 are best simply due to their power), your attachments, and your wood – now it’s time to get routing! But before you dive in, there are a few key techniques you’ll want to master.
First and foremost, always use a cutting guide or straight edge to keep your cuts nice and clean. Trust me, trying to freehand this stuff is a recipe for disaster. You want those edges to be crisp and consistent, and a guide is the way to go.
As for your routing motion, start by holding the Dremel at a slight angle to engage the cutting edge of the bit. Then, take it slow and steady – rushing through the process is a surefire way to overheat the bit and potentially damage your wood.
In fact, it’s generally a good idea to make multiple, shallow passes rather than trying to hog out a ton of material all at once. That’s a quick way to end up with some serious burning and splintering. Slow and steady really does win the routing race.

Dremel Routing: The Pros and Cons
Next, I know what you might be thinking – can a Dremel really stand up to the power and precision of a full-sized router? It depends.
For smaller, more intricate projects, the Dremel is a dream to work with. Its high-speed, low-torque design makes it perfect for delicate cutting and shaping. I’m talking things like decorative edge work, inlays, and super-precise details.
But when it comes to larger-scale routing tasks, the Dremel might start to show its limitations. See, that low-torque design means it can struggle with removing larger volumes of material, especially in harder woods. You might end up with a little more burning and tearout than you’d get with a dedicated router.
So if you’re planning on taking on a major routing project – say, building some custom cabinets or furniture – you might want to invest in a full-sized router. But for those smaller, more intricate jobs, the Dremel is definitely up to the task.

To Wrap Up
Alright, there you have it – the scoop on using your Dremel as a versatile routing tool. Sure, it might not be as powerful as a traditional router, but trust me, this little rotary tool is no one-trick pony.
With the right attachments, bits, and techniques, you can unlock a whole new world of custom woodwork art. From decorative edge details to precision-carved designs, the Dremel is a seriously underrated routing powerhouse.
References:
Routing for beginners | Dremel https://www.dremel.com/gb/en/make-with-dremel/how-to/how-to-get-started-with-routing

")
